Basement Finishing and Home Remodeling 101
After deciding to finish your basement there are many items to take into consideration. In this article we will explore the different basement finishing options you have, and examine the benefits and drawbacks to each all while factoring cost into the equation of finishing a basement.
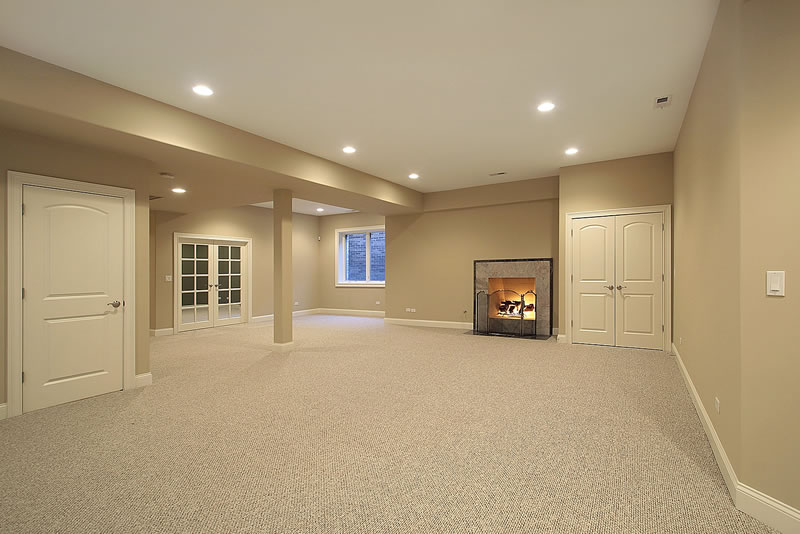
For many people their basement is the biggest untapped investment. While basements often times appear gloomy, and or have water infiltration, know that the potential exists to transform it from gloom to dreamy.
Basements are great spaces for entertaining, an additional bath, a kitchenette, a media room, a play area, a wet bar, an office, or additional bedrooms. The options to finish a basement are endless. There are countless contractors selling even more different systems all claiming to be, and have the best.
This being said, I thought this article could help inform you on the different techniques and options available for you. Before we start with our basement remodeling and basement wall, egress window and basement ceiling options such as a suspended ceiling or drop ceiling, lets start with your existing space and conditions.
Do you currently have water leaking in or puddling in your basement?
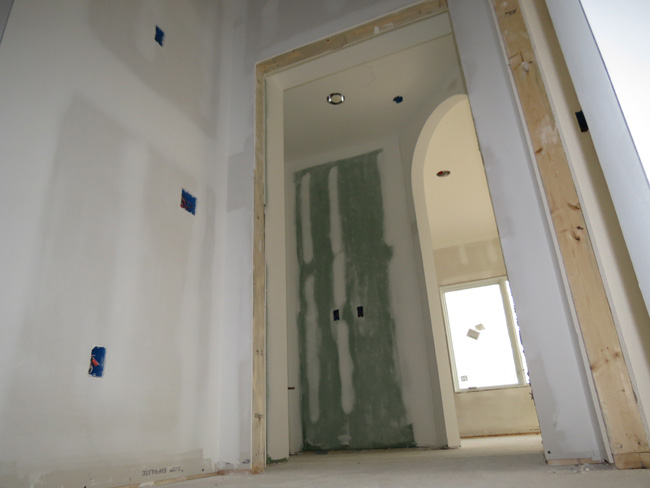
If so, then the first step will be eradicating the conditions causing the problems. Typical areas of concern are basement windows, foundation penetrations, foundation cracks, and the seam between your foundation and your slab floor.
To thoroughly inspect your basement, clean everything out from the perimeter so that all of the exterior basement walls can be easily seen and inspected. If lighting is poor, run temporary lighting to allow easy viewing. Now look to the problem areas listed above. It helps to do this during extreme rains for obvious reasons.
If the water is coming in through a window, then installing a new window well outside with a drain line which connects to the home’s drainage system will be the first step. Once the well is properly installed, the window itself can be inspected and replaced if necessary.
If the water is entering through a foundation penetration such as drain lines, waterlines, or vents then fixing the problem should be easy. Dig outside to where the penetration enters your home. Clean the area free of dirt and debris, then seal the crack between the pipe and foundation with the proper ASTM sealant. Note that the appropriate material depends on the condition of your foundation and what is penetrating it. Back fill with gravel then dirt, caulk interior with same sealant, and problem solved.
If the water is intruding through cracks in your foundation and basement walls, then epoxy injections are the only sure bet other than digging around your entire house and applying foundation waterproofing. Epoxy injection is effective and relatively cheap compared to the benefits achieved by utilizing them. Holes are drilled and spaced evenly according to the width and length of the crack. Two part expanding epoxy is injected into the wholes thus filling the entire crack from the inside out creating a strong water proof patch which will last for 20 years or better. Upon full expansion of the epoxy, the excess material is toweled off creating a smooth effective water barrier.
The most serious kind off water leak is when, the water is entering through the seam between your foundation and concrete slab flooring. If you have a operating sump pump pit adjust it to a lower level. If not, one will need to be installed in order to relieve some of the underground water pressure. Next, the slab must be cut at least 12 inches from the foundation all the way around your basement. The dirt, hopefully gravel, must then be dug out to accommodate your new drainage system. There are several products available for these drainage systems but, all work in the same manner.
The first piece has a vertical lip which catches water from above. The next piece looks and acts very similar to the gutters on your houses eves. The gutter is installed around the perimeter and is tied into either your existing drain system or the sump pit depending on scope and severity of your job. The whole is then filled with gravel around the “gutter” then, patched with concrete.
This method can be costly but, it is the only sure bet for waterproofing this type of leak.
If you have a dry basement or have just finished waterproofing your basement, then the next thing to do is to begin planning the design and layout of your new proposed space.
When designing this space take into consideration how you and your family will be able to use it, then plan the amenities accordingly. Talking to a professional during the planning stage can help because the existing plumbing and mechanical can dictate where items can be placed to maintain cost efficiency.
As for basement wall systems, there are several.
The most popular is standard drywall and wood stud construction. People who sell expensive wall systems try to scare potential customers with exaggerated mold stories and worse case scenarios but at the end of the day, it is a proven technique that when properly installed can be as healthy and beautiful as any other on the market while keeping cost minimal.
Another popular technique we have seen grow in popularity over past five years is, metal studs and fiberglass faced drywall.
The benefit to this technique is that mold, when given the opportunity will grow first on the paper face of the drywall, then on the bottom plate of the wood stud wall. Utilizing metal studs eliminates bottom plate mold growth and likewise for fiberglass drywall. Having no paper or wood in the wall gives the mold less places to develop into maturity.
This technique is on average 10% to 15% percent more costly, and has a few other drawbacks as well such as, it is hard to hang cabinets on metal studs, the finished wall contains less rigidity than a wood wall, and has less soundproofing capabilities than its wooden counterpart.
Other options include “Owens Corning” wall panels.
I used Owens Corning as an example but, there are several different manufactures of similar systems all with their own proprietary advantages and disadvantages. These systems are typically very expensive and come with high pressure sales and ascetic disadvantages. The panels come in various sizes and seams can be seen in between each.
Some times battens or strips are installed over the seams giving a look not much different from smooth plywood with 1×4’s nailed over them. Other disadvantages are, this systems inability to be modified.
For instance maybe you have another kid or need an in home office. With these wall panel systems modifying the space and maintaining fluency in your basement means shelling out big dollars. Also hanging pictures and shelving is very difficult, so much so the manufacturer sells wall mounting kits utilizing special hardware.
Therefore if you choose this system and want to hang some of your kids artwork in their basement play room, plan on getting your credit card out, and waiting on hold. Those are the most popular three. There are many more and I would be happy to discuss others with you, just contact me at (937) 605-6882 and we can set up a time.
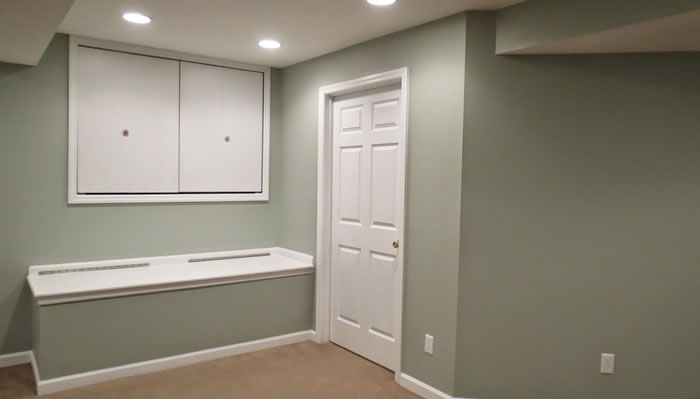
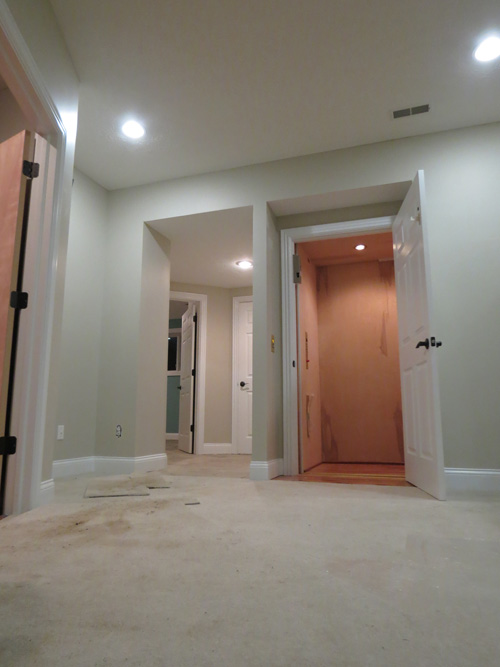
Once you have decided what walls system is best for you and your budget, the next item is ceiling options. The first and most popular is of course drywall. You most likely have a drywall ceiling in the room you are reading this article in right now and, it is the best material in order to maintain fluency with the rest of your house.
Drywall is relatively cheap and offers a clean finish with very little maintenance. Drywall can also be textured to match an existing or create an entirely new look. Some drawbacks of dry walling a basement ceiling can be; Often times a basement has an abundance of mechanicals running through it and items such as electrical lines, plumbing lines, and HVAC ductwork pose an obstacle for achieving a consistent and un obtruded ceiling.
Others include extended accessibility. It can be very hard to run new wiring, lighting, and other items through a dry walled basement ceiling. This being said it is crucial to plan your space properly the first time and make the spaces multi functional to accommodate changing lifestyles.
Another popular ceiling option is suspended or drop ceilings. You probably have them at work. They are 2×4 or 2×2 panels laid into a steel frame. Drop ceilings are clean, able to be painted, and make running addition wires, and addressing above mechanical issues in the future a breeze. Standard drop ceilings run close to the same cost as a dry walled ceiling but, can get wildly expensive according to the style of pad you choose.
Pads can be recessed for a dimensional look or flat for a standard look. Many people enjoy the luxury of being able to work on mechanicals in the ceiling, without calling a drywall guy and painting, an option only drop ceilings provide.
There are also various basement flooring options available to todays consumer for finishing off your basement remodeling project or renovation, here are some basement flooring options you can consider.
Read More About Basement Finishing Here!